Your Land Rover’s brakes are its most important safety system. Whether you’re navigating rush-hour traffic near downtown San Antonio or winding through the Hill Country, your stopping power must be sharp and reliable. Over time, brake pads wear down, just like the soles of a shoe. Let them go too long, and you’ll not only reduce braking efficiency—you could damage your rotors or calipers, leading to expensive repairs. Replacing brake pads at the right time keeps your vehicle safe and responsive.
Why Brake Pads Matter More Than You Think
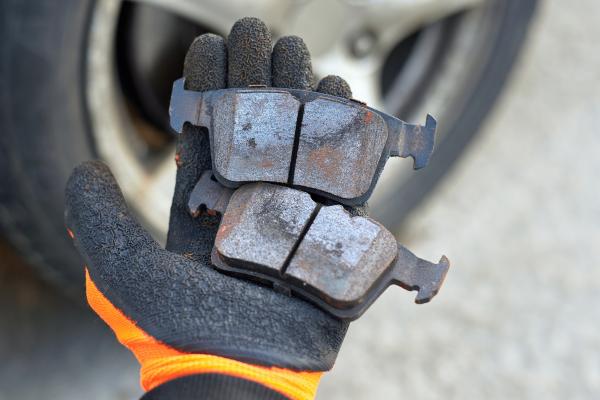
Brake pads create the friction needed to slow your wheels when you press the brake pedal. Each time you stop, a small amount of the pad material wears away. Heat, speed, and weight all affect how quickly that happens. In San Antonio’s hot weather and frequent stop-and-go traffic, your pads may wear faster than the national average. Regular brake service is your best defense against long-term damage.
If your brake pads are the pencils, the rotors are the paper. Push too hard for too long, and eventually, you’ll write right through the page.
When to Replace Land Rover Brake Pads
Many Land Rovers include brake wear sensors that trigger a dashboard light when pads get too thin. But you might also notice squeaking, grinding, or longer stopping distances. As a general guideline, brake pads last 30,000 to 70,000 miles, but city driving, towing, and aggressive braking can cut that in half.
San Antonio’s combination of heat, urban congestion, and highway stretches means it’s smart to inspect your brakes at least once a year.
Tools and Materials Needed
Before starting, gather your tools and supplies:
- New brake pads (OEM or equivalent)
- Jack and jack stands
- Lug wrench
- Socket wrench set
- C-clamp or brake caliper tool
- Brake cleaner
- Gloves and eye protection
- Torque wrench
- Anti-squeal lubricant (optional)
Step-by-Step Brake Pad Replacement Process
1. Park Safely and Loosen Lug Nuts
Park on a flat surface and set the parking brake firmly. Before lifting the vehicle, slightly loosen the lug nuts while the wheels are still in contact with the ground to keep them from turning.
2. Lift the Vehicle and Remove the Wheels
Use a jack to raise the vehicle and secure it on jack stands. Finish removing the lug nuts and take off the wheel to expose the brake caliper.
3. Remove the Caliper Bolts
Find the mounting bolts behind the brake caliper and use a socket wrench to carefully loosen and take them out. Carefully slide the caliper off the rotor and support it with a hanger or rope so it doesn’t stress the brake hose.
4. Take Out Old Brake Pads
Slide the old brake pads out of the caliper bracket. Note how they’re positioned—you’ll need to match the placement with the new ones.
5. Compress the Caliper Piston
Slowly press the piston back into the caliper housing using a brake tool or a C-clamp, applying steady, even pressure.This makes space for the new, thicker pads. Go slowly to avoid damaging the piston or seals.
6. Install the New Brake Pads
Place the new pads into the caliper bracket. Apply anti-squeal compound to the back of the pads if desired. Ensure they sit flush and centered.
7. Reinstall the Caliper
Slide the caliper over the new pads and line up the bolt holes. Reinstall and tighten the caliper bolts to the manufacturer’s torque specifications.
8. Repeat on the Other Side
Follow the same steps for the opposite wheel. Brake pad replacement should always be done in pairs to ensure balanced braking.
9. Reattach Wheels and Lower the Vehicle
Mount the wheels back onto the hubs, tighten the lug nuts by hand, lower the vehicle, and torque the nuts to spec in a star pattern.
10. Pump the Brake Pedal and Test
Before driving, pump the brake pedal a few times to seat the new pads. Check for firmness. Then take a short test drive, braking gently at first to bed the pads properly.
Common Mistakes to Avoid
It’s common for some drivers to overlook compressing the caliper piston or accidentally strain the brake line by letting the caliper hang freely. Others skip torquing the lug nuts or forget to pump the pedal before driving. Each of these steps is critical to ensuring the brake system functions safely and effectively.
Case Study: Maria’s DIY Experience in Alamo Heights
Maria, a nurse in the Alamo Heights area of San Antonio, decided to replace her 2015 Range Rover Evoque’s brake pads herself after getting a $500 quote from a local shop. She watched a few tutorials and got started. But halfway through, she realized her caliper piston wouldn’t compress with her standard clamp. In frustration, she forced it—and ended up damaging the rubber boot inside.
When she took the vehicle to a professional, they had to replace the caliper entirely, turning a $120 pad job into a $400 repair.
What this means for you: DIY can save money, but having the right tools—and knowing when to stop—is just as important as doing the job yourself.
DIY vs. Professional Brake Service
Replacing brake pads is one of the more accessible DIY car repairs, but it still carries risks. Incorrect installation can affect your ability to stop safely. Professionals check more than just pads—they inspect rotors, brake fluid, calipers, and hardware. If you’re short on time, tools, or confidence, it’s worth calling a trusted shop.
Ruben’s Auto Repair in San Antonio offers expert brake services tailored to Land Rover vehicles. Whether you need a second opinion or want a full inspection, their ASE-certified team is ready to help.
Frequently Asked Questions (FAQs)
- How much does it cost to replace Land Rover brake pads in San Antonio?
Expect to pay between $200 and $400 depending on your model and whether rotors also need service. DIY parts may cost $100–$150. - Can I just replace the front or rear pads?
Yes, but it’s best to replace pads on both sides of the same axle to ensure even braking. Don’t mix new and old pads on the same side.
- How do I know when my brake pads need replacement?
Look for squeaking, grinding, longer stops, or a dashboard brake warning. You can also visually inspect pad thickness through the wheel. - Should I replace the rotors too?
Not always. If the rotors are smooth and within thickness specs, they can be reused. Grooved or warped rotors should be resurfaced or replaced.
What happens if I delay replacing brake pads?
Worn pads reduce stopping power and can damage the rotors, leading to more expensive repairs and unsafe driving conditions.